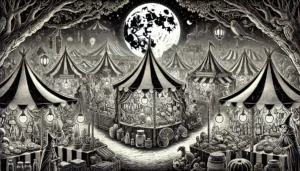
For decades, the crumbling ruins of Blackthorn Manor have stood as a grim reminder of ambition turned to madness. Once the opulent estate of Lord Edric Blackthorn, a brilliant but obsessive alchemist, the manor now lies in decay after a catastrophic experiment went terribly wrong. Local villagers give the ruins a wide berth, speaking in hushed tones of strange lights that dance in the darkness and unsettling sounds that echo from beneath the collapsed structure.
Lord Blackthorn’s pursuit of immortality consumed his final years. Working in secret laboratories hidden beneath his manor, he delved into forbidden alchemical practices, seeking to unlock the secrets of eternal life. His experiments grew increasingly desperate and dangerous until one fateful night when screams echoed across the countryside, followed by an eerie silence that has lasted ever since.
Rumors persist of a hidden vault containing Blackthorn’s greatest treasures and most dangerous creations, sealed away in the depths beneath the manor’s ruins. Whether these stories are mere folklore or hold a grain of truth remains to be discovered by those brave enough to venture into the shadows of the past.
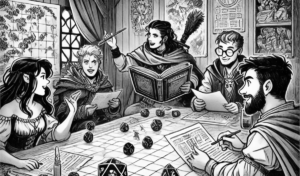
Adventure Hooks
The Scholar’s Commission: Master Aldric Voss, a respected researcher from the nearby Academy of Arcane Arts, approaches the characters with a lucrative proposition. He seeks Lord Blackthorn’s legendary research notes on transmutation magic, particularly a tome called “The Principles of Perpetual Essence.” He’s willing to pay handsomely for its recovery, though he warns that others may also be searching for Blackthorn’s secrets.
The Bandit’s Gambit: Word has reached the ears of Gareth “Ironhand” Maddox, a notorious bandit leader, about the treasures supposedly hidden beneath Blackthorn Manor. Rather than risk his own men in the dangerous ruins, he’s decided to let others do the work for him. The characters may discover they’re being followed, with Gareth planning to ambush them once they’ve cleared out the dangers and claimed the treasure.
The Creeping Plague: A mysterious wasting illness has begun to spread through the nearby village of Millbrook. The afflicted suffer from hallucinations, gradual weakness, and an unsettling pallor that grows worse each day. Village elder Martha Crowley believes the sickness may be connected to Lord Blackthorn’s forbidden experiments, and she desperately seeks heroes willing to investigate the source and find a cure.
The Descent into Darkness
The entrance to Blackthorn’s hidden laboratory lies concealed beneath the manor’s collapsed eastern wing. Characters must navigate through debris and overgrown vegetation to locate the concealed stone staircase that descends into the depths. The air grows noticeably colder as they descend, carrying with it the musty scent of long-sealed chambers and something else—a faint, metallic tang that seems to coat the back of the throat.
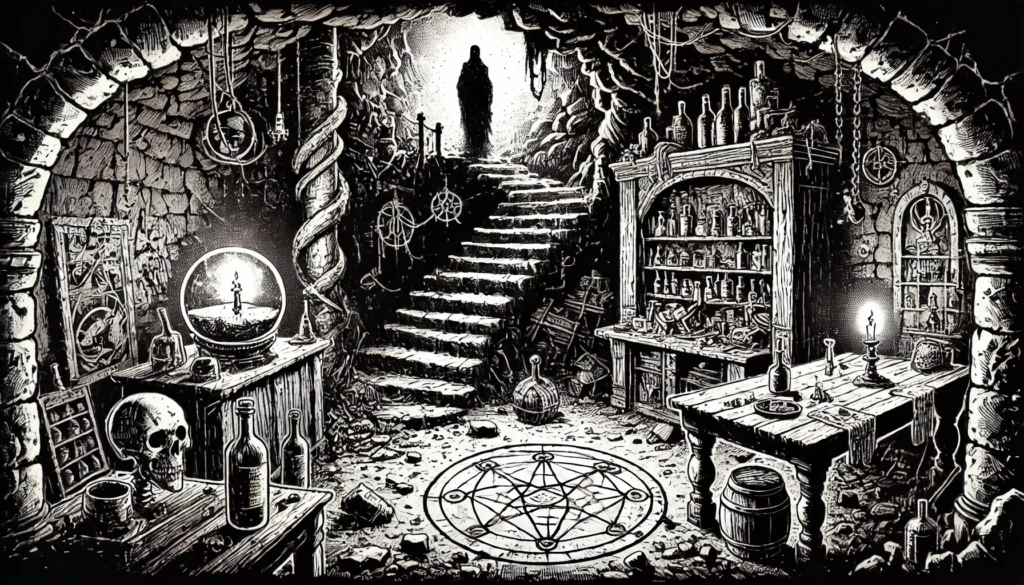
Room 1: The Collapsed Cellar
Read or paraphrase the following when the characters first enter:
The stone staircase ends in a cramped, low-ceilinged chamber thick with the oppressive weight of years. Dust motes dance in whatever light you carry, revealing the scattered remains of what was once an impressive wine collection. Broken barrels lean against damp stone walls, their contents long since evaporated, leaving only dark stains on the floor. Shattered crates lie among piles of debris, their splintered wood dark with mildew.
In the far corner, a mound of fallen stones and rotted timber blocks much of the room, but beneath it, you catch glimpses of a faint, pulsing glow—like the dying embers of a fire that refuses to be extinguished.
Features and Challenges
Unstable Debris: The collapsed ceiling has left this chamber structurally unsound. Characters who move hastily or make excessive noise risk triggering a small cave-in. When a character moves at normal speed through the debris-filled areas, they must succeed on a Dexterity check to avoid dislodging unstable stones that could crash down upon them.
Residual Magic: Characters who examine the room carefully can detect traces of lingering magical energy. A successful Perception or Search check reveals that the faint glow emanating from beneath the debris pulses in a steady rhythm, suggesting it originates from an active magical source rather than mere phosphorescence.
Hidden Passage: The debris pile conceals more than just broken stone and timber. Behind the rubble, a section of the eastern wall is actually a cunningly crafted false panel. Characters who investigate the source of the glow discover that the wall here is hollow. With careful work to clear away the debris, they can reveal the hidden passage that leads deeper into Blackthorn’s domain.
Treasure: Amidst the broken crates, characters may find remnants of Lord Blackthorn’s former wealth: a few bottles of rare vintage wine that have somehow survived the years (worth considerable coin to the right collector), and a small silver signet ring bearing the Blackthorn family crest—a thorned rose wrapped around an hourglass.
Room 2: The Alchemist’s Workshop
When the characters enter the workshop, read:
You step into what can only be described as a madman’s laboratory. The chamber stretches before you, lined with workbenches that sag under the weight of decades of neglect. Shattered glass crunches underfoot—the remains of countless beakers, retorts, and alchemical apparatus. Stains of every conceivable color mar the wooden surfaces: vivid purples that seem to shift in the light, sickly greens that bubble despite having dried long ago, and deep crimsons that look disturbingly fresh.
The source of the glow becomes clear—a circular pattern of intricate runes has been carved directly into the stone floor at the chamber’s center. The symbols pulse with eldritch energy, casting dancing shadows on the walls and filling the air with a low, almost subsonic hum that you feel more than hear.
And there, hunched over the runic circle with his back to you, is a figure in a tattered coat. He seems to be working, his hands moving in precise gestures over the glowing runes, but something about his posture—too still, too rigid—suggests all is not as it appears.
The Alchemical Wraith
Lord Edric Blackthorn’s spirit lingers in this chamber, trapped by his obsession and the incomplete nature of his final experiment. He is not immediately hostile, but his presence radiates an overwhelming sense of melancholy and frustrated ambition. His form flickers between solid and translucent, and his voice carries the hollow quality of words spoken from a great distance.
First Contact: When Blackthorn first becomes aware of the characters, he does not turn to face them immediately. Instead, his voice drifts across the chamber: “Another set of hands, grasping at knowledge… Tell me, do you come seeking wisdom, or do you merely wish to plunder the works of the desperate?”
The Ghost’s Burden: Blackthorn cannot find peace because his life’s work remains unfinished. His final experiment—an attempt to create a true elixir of immortality—failed catastrophically, trapping him between life and death. He speaks in riddles and half-truths, but his meaning becomes clear to persistent questioners: “I sought to cheat death, but death has cheated me instead. The formula was flawed… always flawed. I can neither complete it nor abandon it.”
Resolving the Haunting
Characters have two primary options for dealing with Lord Blackthorn:
Combat: If the characters attack or refuse to help, Blackthorn fights with the desperate fury of the damned. However, defeating him through combat alone provides only temporary respite—his spirit will reform in 2d4 days, angrier and more aggressive than before.
Diplomacy and Resolution: The true solution requires helping Blackthorn find peace by addressing his unfinished work. Characters must:
Locate the Research Notes: Hidden within a secret compartment of Blackthorn’s desk is his final journal, containing the flawed formula for immortality.
Choose the Path: The characters must decide whether to perfect the formula or destroy it entirely. Both require successful Intelligence or Arcana checks, but the consequences differ significantly.
Complete the Ritual: If perfecting the formula, the ritual creates a true elixir of immortality—a treasure of immense value and danger. If destroying it, the characters must cast the research and the philosopher’s stone fragment into an alchemical fire, ending Blackthorn’s obsession forever.
Workshop Features
Active Rune Circle: The glowing circle is the focal point of Blackthorn’s failed experiment. It pulses with unstable energy and serves as the anchor for his spirit. Characters with magical knowledge recognize it as a transmutation circle designed to transform base matter into something far more precious.
Laboratory Equipment: While most of the glassware is shattered, some intact pieces remain. A thorough search reveals several aged potions of uncertain potency, along with rare alchemical components that could prove valuable to the right buyer.
The Sigil Key: Among Blackthorn’s possessions, characters can find an ornate brass key inscribed with arcane symbols that match those on the rune circle. This key is essential for accessing the deeper chambers of his laboratory complex.
Treasure
The workshop contains numerous valuable items for those willing to search carefully:
Blackthorn’s Final Alchemy Notes: The leather-bound journal containing his immortality research—crucial for resolving his haunting and potentially valuable to scholars of the arcane arts.
Philosopher’s Stone Fragment: A small, pulsing red crystal that radiates unstable magical energy. It can serve as a powerful alchemical reagent or fuel source for magical devices.
Elixir of Unstable Life: A murky green potion that can restore vitality but causes vivid, disturbing hallucinations for an hour after consumption.
Preserved Homunculus: A small, humanoid creature suspended in alchemical fluid within a sealed jar. If awakened, it whispers forgotten secrets in ancient languages.
Glass Vial of Liquid Sunlight: A remarkable creation that emits brilliant light in a 30-foot radius for a full day when unstoppered. The light is particularly effective against undead creatures.
Room 3: The Black Vault
When the characters unlock the vault door, read:
The heavy iron door swings open with a groan that echoes through the chamber like a death rattle. Beyond lies a rectangular room lined with stone shelves, each one carefully organized and meticulously maintained despite the years of abandonment. Ancient tomes bound in leather and stranger materials fill the upper shelves, while lower ones hold an array of artifacts that gleam with their own inner light.
Stacks of gold coins catch your light, along with gemstones that seem to pulse with captured starlight. Strange devices of brass and crystal sit alongside weapons that hum with barely contained power. This is clearly where Lord Blackthorn stored his most precious discoveries and dangerous creations.
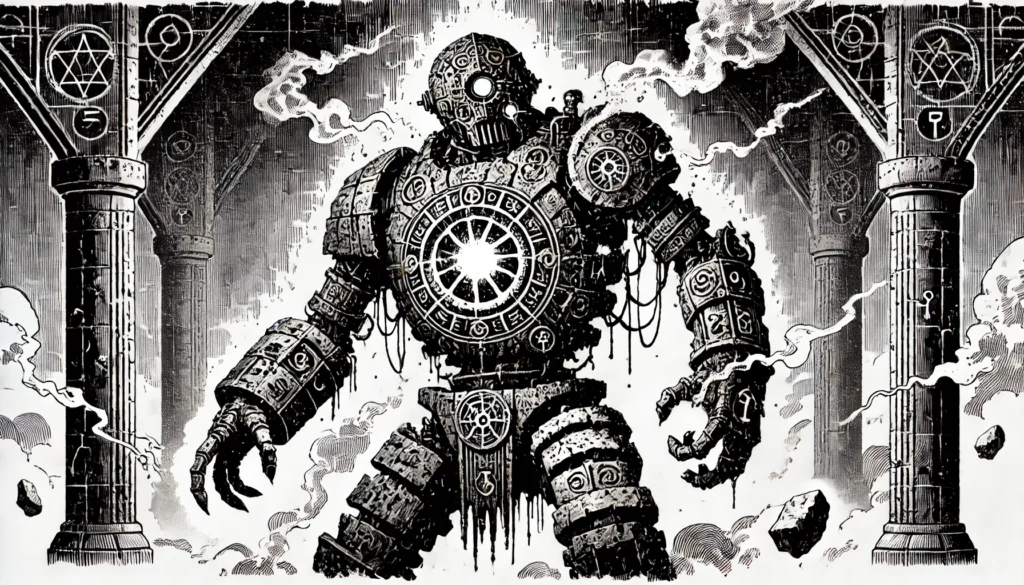
But as you step across the threshold, a grinding sound of metal on stone announces that you are not alone. In the center of the chamber, what you initially took for a statue begins to move. The figure is humanoid but clearly artificial—crafted from iron plates riveted together with mechanical precision. Rust streaks its surface like old blood, and its eyes begin to glow with an ominous red light. Most striking of all, an ornate keyhole in the center of its chest pulses with the same arcane energy you witnessed in the alchemist’s workshop, its symbols glowing brighter as the construct fully awakens.
Lord Blackthorn’s most impressive creation stands sentinel in this chamber—a massive Iron Golem forged from magically reinforced metal plates. This construct represents the pinnacle of alchemical engineering, standing nearly eight feet tall with a frame that speaks of both incredible strength and relentless purpose. Years of inactivity have left rust streaking its surface like dried blood, but its core systems remain frighteningly intact.
Combat Behavior: The Iron Golem activates the moment intruders cross the vault’s threshold. It attacks with mechanical precision, focusing on the closest threat with devastating punches and bone-crushing slams. Its massive fists can send opponents flying, while its reinforced construction shrugs off most conventional attacks.
Poison Gas Threat: On either the first or second round of combat (determined randomly), the golem unleashes its most terrifying weapon—a cloud of toxic alchemical vapors that fills a 10-foot cube directly in front of it. This poisonous breath weapon represents Blackthorn’s fusion of alchemical warfare with construct design, and it regenerates every few rounds throughout the battle.
Arcane Absorption: The golem’s alchemical systems can absorb and redirect magical energy from weaker spells. Low-level magic actually strengthens the construct, healing its damage while reducing the spell’s effectiveness. Observant characters may notice the golem seems to grow stronger when struck by minor magical attacks.
Critical Vulnerability: When the golem sustains significant damage, its alchemical core begins to leak volatile compounds. This creates an extremely dangerous situation—the construct will detonate in a massive explosion of fire and poison if pushed to its limits. Characters must decide whether to risk the explosion for a decisive victory or find alternative solutions.
The Runic Override: Characters who obtained the sigil key from the workshop can attempt to shut down the golem without combat. A glowing keyhole pulses with the same arcane energy as the workshop’s rune circle, prominently displayed in the center of the construct’s chest and inscribed with matching symbols. Success requires either exceptional dexterity to avoid the golem’s attacks or deep understanding of its magical systems.
Tactical Considerations: The golem’s alchemical construction makes it completely immune to fire, poison, and non-magical weapons, while its reinforced plating reduces damage from most physical attacks. However, acid proves particularly effective against its iron frame—a weakness that clever characters might exploit using supplies from Blackthorn’s workshop.
Vault Treasures
The Black Vault contains Lord Blackthorn’s most valuable accumulations:
Weapons and Armor:
An ornate steel longsword with a hilt wrapped in ancient leather, still carrying the scent of battle
A charred knight’s shield, blackened from previous encounters but still functional and protective against acid
A rusted warhammer engraved with dwarven runes that, when properly restored, proves exceptionally effective against constructs
Magical Items:
An alchemical lodestone that glows when near magical constructs and aids in disabling golems and magical traps
A ring of tempered will that allows the wearer to resist exhaustion and alchemical effects
A flask of quicksilver, useful in transmutation magic and particularly harmful to constructs
Alchemical Supplies:
A potion of molten skin that grants temporary resistance to fire damage
A bag of crushed emerald dust worth a small fortune to the right buyer
An alchemical fuel vial containing volatile substances that can power ancient machinery or serve as an explosive
Knowledge:
A tattered spellbook bound in cracked blue leather, containing valuable arcane formulas
Additional research notes detailing construct creation and maintenance
Conclusion
The fate of Lord Blackthorn’s legacy rests in the characters’ hands. Whether they choose to profit from his discoveries, ensure his tormented spirit finds peace, or attempt to continue his dangerous research will shape not only their immediate fortunes but potentially the safety of the surrounding region.
The treasures recovered from the Black Vault represent both opportunity and responsibility. The knowledge contained within Blackthorn’s notes could advance alchemical understanding by decades—or unleash horrors that the world is not prepared to face.
As the characters emerge from the depths of Blackthorn Manor, they carry with them not just material wealth, but the weight of decisions that will echo far beyond this single adventure. The village of Millbrook may be saved or doomed by their choices, and Lord Blackthorn himself may finally find the peace that eluded him in life—or remain trapped in his obsession for eternity.
Appendix: Spells from Blackthorn’s Spellbook
For Game Masters whose systems include spell research or magical learning, the following spells can be found within Lord Blackthorn’s tattered spellbook:
Acid Arrow: A concentrated bolt of corrosive energy
Stone to Mud: Transmutation magic for softening stone barriers
Repair Damage: Originally designed for construct maintenance
Fireball: Classic destructive evocation
Wall of Fog: Obscurement magic for tactical advantages
Animate Object: Temporary animation of inanimate items
Protection from Elements: Defensive magic against environmental hazards
Resist Energy: Focused protection against specific damage types
Dispel Magic: For countering magical effects and enchantments
Polymorph Self: Advanced transmutation for changing one’s form
Each spell entry includes detailed notes on Blackthorn’s particular applications and modifications, providing insight into his alchemical approach to traditional magic.