This adventure is designed to teach dungeon exploration to a new group of players. While the story is cliche, it is a good starting point to introduce low level monsters and situations and really the adventure starts at the cellar doors.
This adventure is designed for a group of 2-5 players and one Dungeon Master – at the end the party should have gained enough experience to advance to level 2 or 3. It should take about 1-2 hours to complete. If you are new to Cresthaven RPG check out Playing the Game for a quick overview.
If you are NOT the Dungeon Master, STOP READING NOW. There is information in the adventure that is secret and for the Dungeon Master’s eyes only. I strongly recommend the Dungeon Master read through the DM’ing basics found here.
I recommend you read through the entire adventure before running it. There are rules dispersed throughout the locations. On the formatting, items inside boxes or italicized are to be read to players, bolded items are rules or checks, lines with a grey bar to the left are stat blocks for monsters – except for the read aloud text, everything else (including the map) is for the DM’s eyes only.
Much needed caravans between Cresthaven and Darkwood have suddenly been the target of vicious goblin raiders. Recent scouts have reported seeing goblins by the Ruins of Darramoka. Heroes are desperately needed to investigate the ruins and possibly eliminate the goblin threat. Can you be those heroes, or are you content to remain in obscurity?
The adventure begins with a call to action, posted prominently on the bulletin board within the bustling Adventurer’s Guild. The King’s Road, a vital artery of trade and travel, has been plagued by a band of cunning highwaymen. These bandits have been attacking merchants and travelers, spreading fear and disrupting the flow of goods. The Guild has placed a reward for anyone who can put an end to this menace.
Intrigued by the prospect of both adventure and reward, the party accepts the quest. Following a series of clues and a crude, barely noticeable trail through the dense forest, they are led to the outskirts of a long-abandoned manor. Local rumors speak of this place as being cursed, with few daring to venture close.
DM Advice: Guiding the Players Through Clues and the Trail
As the Dungeon Master, your role is to make the players feel like they are actively piecing together the puzzle that leads them to the ruins. The process of following clues and uncovering the trail should be engaging, rewarding their curiosity and decision-making.
1. Planting the Clues
Initial Clues at the Adventurer’s Guild
Start by providing the players with the quest details from the bulletin board. Along with the quest, include a brief mention of recent reports from travelers—such as strange noises, glimpses of figures in the forest, or finding discarded items along the King’s Road. These hints should point them toward investigating the area more closely.
Encounters Along the Road
As the players travel along the King’s Road, introduce minor encounters or discoveries. For example, they might find a ransacked merchant’s cart, signs of a struggle, or broken arrows. These elements should be spread out to give the players a sense of progression as they close in on the source of the disturbances.
NPC Encounter: A Desperate Traveler
As the players near the outskirts of Cresthaven, they come across a lone traveler slumped against a rock at a crossroads. This encounter serves as an introduction to NPC interactions, teaching players how to ask questions, gather information, and roleplay.
Read-Aloud Text for the DM
“The road ahead is quiet, save for the rustling of leaves in the trees. Just off the path, a weary man sits against a moss-covered stone, rubbing his forehead. His clothes are torn, his boots muddied, and a faint bruise colors the side of his face. He looks up at you with tired, hopeful eyes and raises a shaky hand in greeting.”
Tavin Reed speaks: “Ah! Travelers—bless the stars. I… I don’t mean to trouble you, but I ran into some real trouble up the road. Raiders. Goblins, I think. They came out of nowhere, knocked me down, and took my pack—everything I had! My coin, my provisions… even my lucky pendant. They left me with nothing but the dirt on my boots.”
He rubs the back of his neck, sighing.
“I don’t suppose… you could spare a few coins? Just enough for a warm meal and a bed at the Crossed Arms Tavern? And—look, I don’t want to impose, but that pendant? It means the world to me. If you happen to come across it while dealing with those goblins… I’d be in your debt. You can find me at the tavern if you do.”
Guidance for the DM: Running This Encounter
Tavin Reed’s introduction is a chance for players to engage with a friendly NPC and practice social interactions. As the DM, prompt players to interact by asking:
“What do you do?”
“Would you like to ask him anything?”
“Do you want to give him any coin?”
“Do you want to ignore the man and move on?”
If players struggle to respond, offer suggestions:
They could offer him some coins.
They could ask about the goblin raiders.
They could attempt to sense if he’s lying.
Skill Check: Charisma + Reputation
If players want to gather more information, have them roll a Charisma check modified by their Reputation.
Success (10+): Tavin recalls details of the goblins’ appearance and direction.
Failure (Below 10): He’s too shaken to remember much but mentions a cave.
Exceptional Success (15+): He remembers seeing a scarred orc leader and notes that the raiders seemed to argue over their loot.
(DM Note: Adjust rolls as needed to keep the story flowing—sometimes, it’s okay to let players succeed if it keeps the adventure moving.)
If Players Refuse to Help
If players refuse to assist him, Tavin sighs but doesn’t argue.
“I understand… just a bad time for me, I suppose.”
If they offer kindness in another way (food, water, etc.), he remembers and might offer discounts or favors later.
If they mistreat him, their Reputation in Cresthaven may suffer.
If Players Are Suspicious
If players believe Tavin is lying, allow a Charisma + Reputation check:
Success (10+): They sense he’s being honest.
Failure (Below 10): He seems like an unfortunate traveler.
Critical Failure (5 or less): They misinterpret his nervousness as deception.
(DM Note: If players act aggressively, Tavin panics, and their Reputation in Cresthaven may suffer.)
Moving the Story Forward
If the players give Tavin coins (suggest around 2-5 silver):
He thanks them warmly: “You’ve saved me tonight. If you find my pendant, I’ll be at the Cross Arms Tavern in Cresthaven. I’ll make it worth your while.”
If they find his pendant, he rewards them with gold, information, or a favor in town.
2. Following the Trail
Spotting the Trail
After leaving Tavin behind, the players will eventually reach the area where the goblins retreated. This is where they must actively search for clues.
Ask players to make appropriate attribute checks (Search, Wisdom, or Tracking) to find the trail:
Success (10+): They locate a faint path of disturbed undergrowth and broken branches.
Failure (Below 10): They lose time searching but eventually find a scuffed rock or torn cloth.
Exceptional Success (15+): They not only find the trail but also recognize goblin footprints and signs of a dragged body.
(DM Note: Handling Failure and Keeping the Story Moving)
Failure doesn’t mean the adventure stops—it just means the path forward gets more interesting. If the players fail the roll, decide on a minor complication that adds tension but doesn’t derail the story. Some options:
They waste an hour searching, increasing the risk of encountering wandering creatures.
They lose something small—a dropped torch, a torn cloak, or spilled rations.
They find the wrong trail first, leading to an abandoned campfire, a broken-down cart, or old bones before getting back on track.
Ultimately, it is your job as the DM to keep the story moving. If the players are truly lost or struggling, guide them back to the ruins in a way that makes sense within the narrative. Maybe an NPC stumbles upon them and points them in the right direction, or they notice smoke rising in the distance; a telltale sign of goblin activity.
This keeps failure engaging without punishing the players unfairly, ensuring the adventure always moves forward while still making their choices feel meaningful.
3. Using the Environment
Environmental Obstacles
As players follow the goblins’ path, introduce environmental challenges that require attribute checks to overcome. These obstacles add immersion and encourage creative problem-solving.
If players choose to use equipment (such as a rope, staff, or climbing gear), they gain Advantage (roll 2d20 and take the higher value) on the check. If a player has an appropriate skill, they may use their skill bonus instead of just their attribute modifier.
Obstacle 1: The Fallen Tree
A massive tree has collapsed across the path, its thick trunk and tangled branches blocking the way.
Players must decide how to navigate it.
Climbing Over (Strength Check, DC 8): Success means they climb over safely.
Failure: They slip and fall, landing hard on the rough bark and taking 1 damage.
Critical Failure (Natural 1): They fall badly, twisting an ankle—applying the Slow condition (Movement is reduced to ½ for 10 minutes).
Obstacle 2: The Muddy Embankment(Unstable Terrain)
The path slopes down toward a shallow stream, but the embankment is slick with mud. One wrong step could send a character sliding down.
Crossing Carefully (Dexterity Save, DC 8): Success means they make it across without issue.
Failure: They lose their footing and slide down, covering themselves in mud and losing a random small item (DM’s choice, such as a torch, waterskin, or pouch of coins).
Critical Failure (Natural 1): They lose two random items and slide straight into the cold stream, soaking their gear (any parchment or scrolls are ruined).
Alternative Approaches:
A player with a staff or spear can use it for balance, gaining Advantage on the save.
A player with rope can tie it to a tree and use it for support, giving the party Advantage on their rolls.
Obstacle 3: The River Crossing(Narrow and Unstable Terrain)
A narrow log bridge spans the stream, barely wide enough for one person at a time. The fast-moving water below isn’t deep, but it could carry someone downstream.
Crossing the Log (Dexterity Save, DC 10): Success means they cross safely.
Failure: They slip and fall into the stream, losing 1 item as the current pulls it away.
Critical Failure (Natural 1): They fall hard and are swept 30 feet downstream, taking 1d4 damage from rocks before they can climb out.
DM Notes: Handling Failure and Consequences
Failure shouldn’t just slow down the players—it should introduce new complications that make the adventure feel real.
Minor Failures cause small setbacks like damage, lost items, or wasted time.
Critical Failures (Natural 1s) should be more severe, such as multiple lost items, more damage, or getting separated from the group.
Players who think creatively (using gear like rope or poles) should be rewarded with Advantage or a lower DC.
This keeps the obstacles engaging, meaningful, and immersive without unfairly punishing the players.
Signs of Danger
To build tension, describe unsettling details:
“The underbrush is still disturbed, as if something large passed through recently.”
“A sudden silence falls over the forest, as if the very trees are holding their breath.”
“The stench of old blood lingers in the air, though no corpses are visible.”
4. Rewarding Exploration
Hidden Discoveries
Players who explore thoroughly may find:
Discarded goblin weapons (rusted but usable).
A half-buried lockbox (requiring a Strength check to unearth).
A wounded animal (which, if helped, could lead to future benefits).
Building Atmosphere
The journey grows darker and eerier as they near the ruins:
“The trees loom taller, their twisted branches clawing at the sky.”
“A low, unnatural fog drapes over the forest floor.”
“You feel a strange pressure in the air, like a storm waiting to break.”
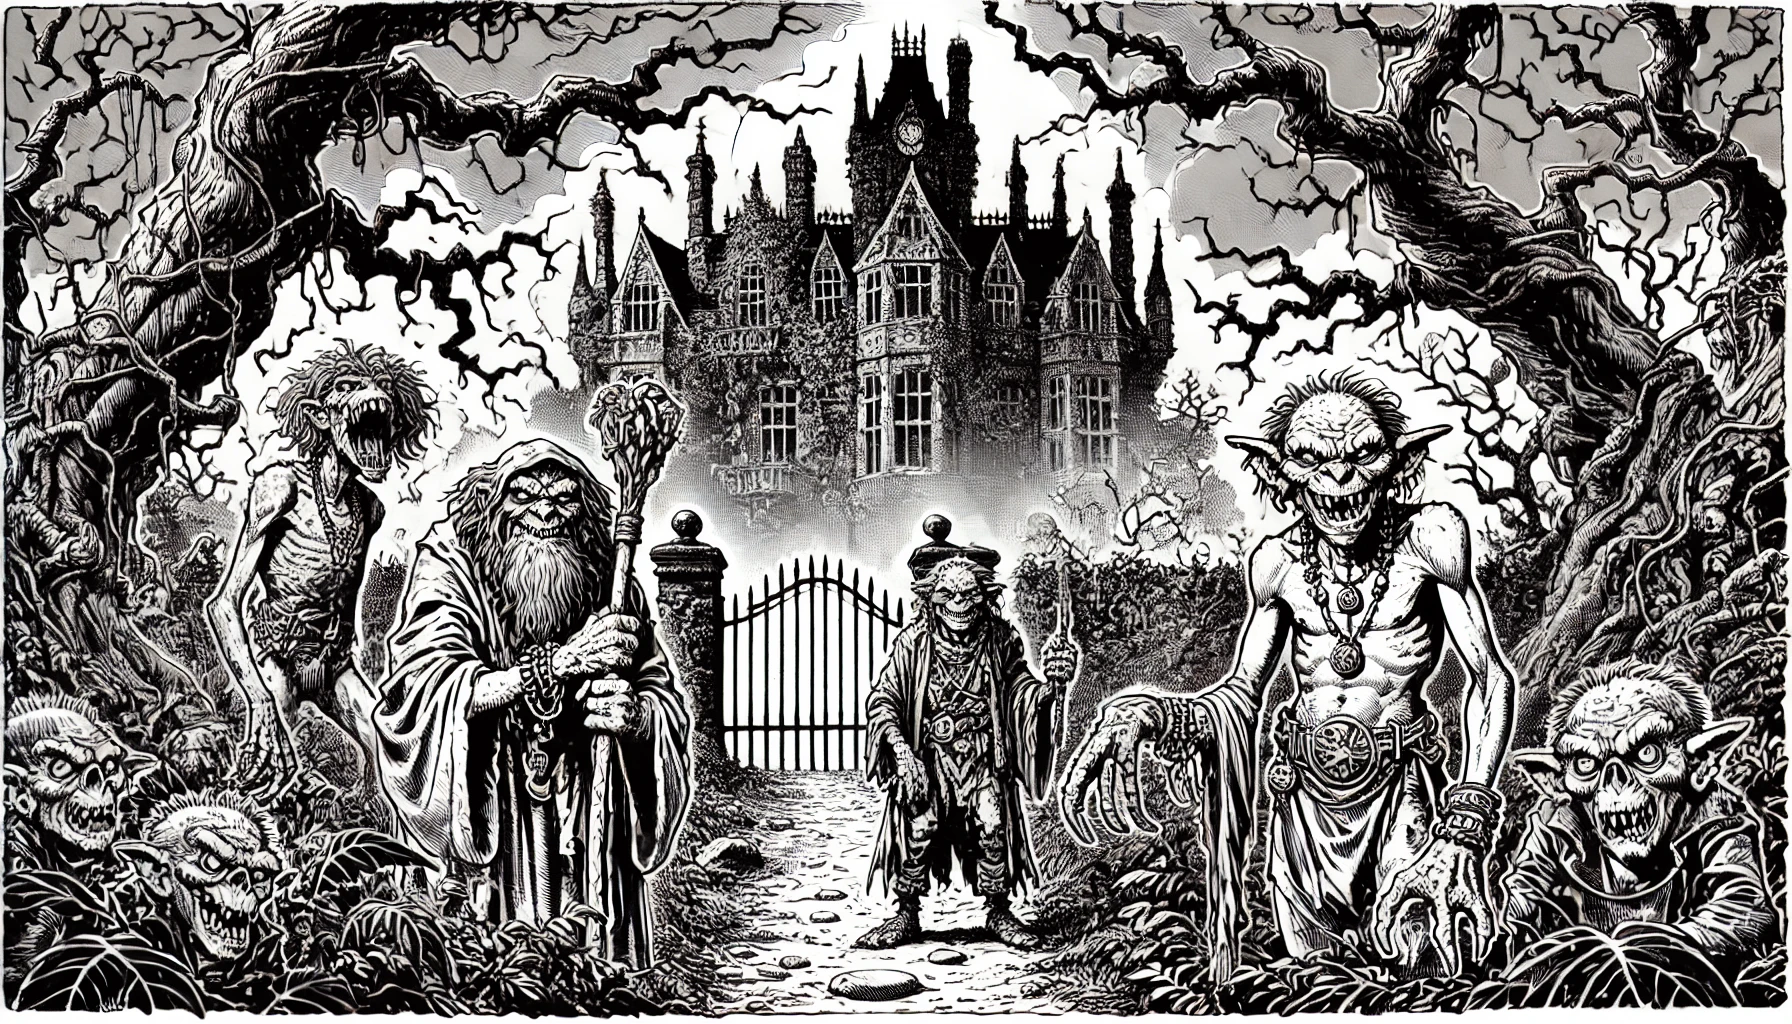
Approaching the Ruins.
As the party approaches the ruins, they find themselves on a narrow, overgrown path. The remnants of what was once a grand estate now lie in ruin, the charred remains of the manor standing as a silent testament to a long-forgotten tragedy. The walls are blackened with soot, and the air is thick with the acrid smell of smoke. Despite the passage of time, the ruins still seem to smolder, as if some unseen fire continues to burn deep beneath the earth.
Before the party stands the last vestige of the manor’s former glory: two imposing stone doors leading down into the cellar. The doors are slightly ajar, revealing a staircase that descends into darkness. The faint, flickering light of smoldering embers can be seen below, casting eerie shadows that dance along the walls.
This is where the adventure truly begins. As the players descend into the depths, they must be prepared to face whatever lurks in the darkness—whether it be the highwaymen they seek, or something far more sinister. The smoldering ruins hide many secrets, and the fate of the King’s Road may hinge on the party’s bravery and skill.
1. Cellar Doors
Heavy stone doors. The doors to the cellar are closed and extremely heavy. Lifting the doors requires an Ability check (DC 10 vs Strength) to open.
Task: The doors are closed and extremely heavy. To open them, players must make a Strength-based Ability Check.
Difficulty Check (DC): 10
Roll: Players roll a d20 and add their Strength Ability Score and any Ability Focus bonus they may have for Strength.
Individual Attempt:
If a player attempts to lift the doors alone, they need to meet or exceed DC 10 to succeed.
Example: A player rolls a 12, has a +3 Strength modifier, and a +2 Ability Focus in Strength. The total is 12 + 3 + 2 = 17, which meets the DC and allows them to lift the doors.
Team Check:
If the whole party decides to help, they use the teamwork rule.
One player rolls the d20, using their Strength Ability Score and Ability Focus. This roll is made with advantage (rolling 2d20 and taking the higher result).
Example: A player with a Strength bonus of +3 and Ability Focus in Strength rolls 2d20 and gets 8 and 15. With advantage, they take 15, resulting in a total of 15 + 3 + 2 = 20. The doors are successfully lifted.
Outcomes
Success (DC 10+): The doors are lifted open with effort. The entrance to the cellar yawns before them.
Failure (Below DC 10): The doors still open, but at a cost: A loud grinding noise echoes through the ruins, potentially alerting anything below.
Critical Failure (Natural 1): The doors open, but the force used causes the player to stumble forward and fall down the stairs. If multiple players were pushing together, any who failed their check must make a Dexterity save (DC 10) to avoid falling as well. Each of the falling players takes 1d6 damage.
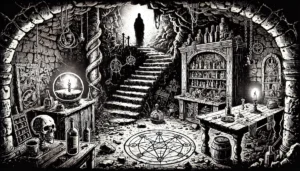
Into the Cellar
Upon lifting the large stone doors, finely carved stone stairs lead down in the cellar of this once rich manor house. The chamber opens into a large space lit from above by a single oil lantern. At the far end of the room is a door that is barred with four heavy stone blocks.
To unlock the barred door, the party must solve a pressure plate puzzle. Two pressure plates on the floor need to be pressed simultaneously to unlock the door.
Finding the Pressure Plates:
Search DC: 10. Characters need to make two successful Wisdom (or Search) check to locate each of the pressure plates.
Clue: Upon a successful search, characters discover that pressing any single plate produces a faint mechanical noise coming from the door. This sound indicates that the plate is connected to the mechanism locking the door.
Solving the Puzzle:
Mechanism: The pressure plates must be pressed at the exact same time to release the locking mechanism.
DM Tip:
If the puzzle is not solved within a reasonable time, or if players roll exceptionally poorly, you might introduce an additional complication: something or someone on the other side of the door might start to open it, potentially surprising the party with an unexpected encounter.
If players struggle with the puzzle, provide them with subtle hints, such as the plates making distinct sounds or vibrations when pressed.
Listening at the Door: A Guide for the Dungeon Master
As your players explore the cellar, this is a prime opportunity to introduce them to the concept of listening at doors—a useful tactic for gathering information about what lies beyond. Note that speaking Goblin is required to understand any conversations they might overhear. Characters could have Goblin as one of their languages on their character sheet or might use a magic spell that allows for language translation.
How to Use Listening:
Offer the Option: For newer players, make sure to offer “Listen at the door” as an action they can take. This helps them understand that they can gather clues about the other side of the door.
Listening Check: To hear the goblins beyond the door, instruct the players to make a listening check. Roll a d20 and add their Wisdom bonus (or any relevant bonuses they might have). Set the Difficulty Check (DC) to 12. If their total meets or exceeds the DC, they can hear muffled noises or voices coming from the other side.
In Practice:
Success: If they succeed, describe the sounds of the goblins—perhaps their chatter, movement, or the clinking of weapons. This gives the players a sense of what they’re up against and allows them to plan their next move.
Exceptional Success: If they roll a 17 or higher, offer additional details. For example, if they understand Goblin, they might overhear the goblins complaining about money or food, providing valuable insight into their current situation and needs.
Failure: If they fail, they may not hear anything specific, or they might only catch vague sounds. This can build tension and make the encounter more unpredictable.
Note for New DMs: Offering “Listen at the door” is a simple yet effective way to engage players and encourage them to use their environment to gather information. It adds depth to the game and can provide valuable insights for their strategy.
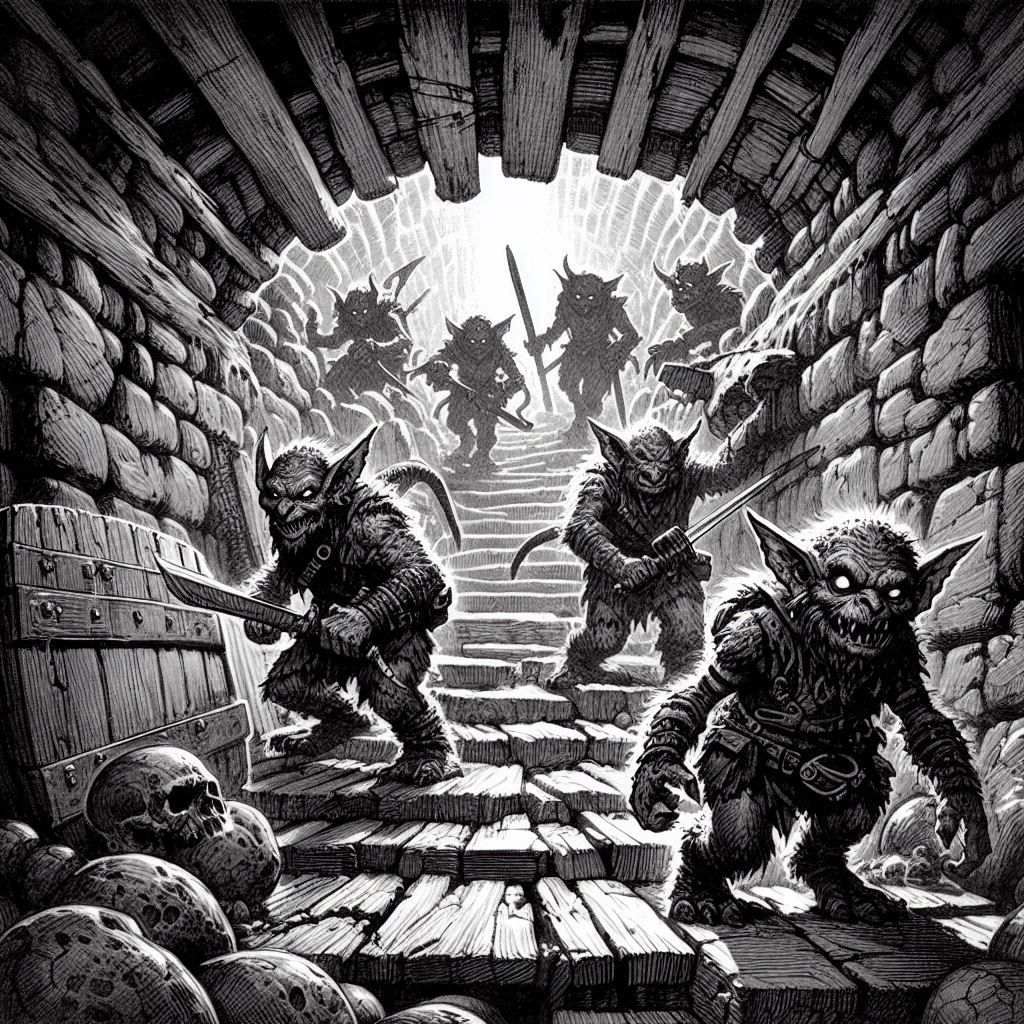
2. Goblin Lookout
As the party enters the Goblin Lookout, they are immediately swarmed by a group of short, ugly humanoids standing just over 3 feet tall. These goblins have scrawny bodies topped with oversized, hairless heads, massive ears, and beady red eyes. Despite their aggressive screeches and threatening gestures, the goblins seem surprisingly wary and hesitant, their eyes darting nervously as if contemplating their next move. This moment of hesitation suggests that they might be open to negotiation or even bribery.
To negotiate with the goblins, players will need to use their Charisma and the combined Charisma bonuses of the party. This provides a structured way to determine the goblins’ response to the party’s attempts at diplomacy.
Negotiation Roll:
Roll a d20 and add the combined Charisma bonus of the party (which includes any relevant Charisma-based skill bonuses).
Negotiation Results Table:
Roll 1-3: Immediately Attack
The goblins are not swayed by the party’s attempts at negotiation and, instead, become more aggressive. They attack the party on sight, escalating the encounter to combat.
Roll 4-10: Roll Again and Subtract 5
The initial attempt to negotiate is met with suspicion or hostility. Roll another d20, and subtract 5 from the result. The outcome could range from continued hostility to a partial success with some complications.
Roll 11-16: Roll Again and Add 5
The goblins are somewhat receptive to the party’s offer or dialogue. Roll another d20 and add 5 to the result. This should yield a better outcome, potentially leading to a successful negotiation or favorable terms.
Roll 17-20: Friendly / Receptive
The goblins are highly receptive to the party’s negotiation efforts. They respond in a friendly manner, providing useful information, safe passage, or assistance.
Bribery or Negotiation Overview
Bribery is an effective way to sway the goblins and potentially avoid combat or gain favorable terms. Players can offer various incentives, such as food, gold, or other valuables. Alternatively, they can use intimidation tactics to leverage their presence.
Types of Bribes:
Food and Supplies:
Offering Food: If the party offers food or supplies, this can appeal to the goblins’ basic needs. The value and type of food will influence the goblins’ reaction.
Example: “The goblins’ eyes widen as you offer them a sack of dried meat and fruit. They hesitantly accept it, their hostile expressions softening as they eagerly devour the food.”
Gold and Valuables:
Offering Gold: This can be particularly effective if the party provides a substantial amount. The more gold or valuables offered, the more likely the goblins are to be satisfied.
Example: “You hold out a handful of gold coins. The goblins’ eyes glitter with greed as they reach for the coins, clearly more inclined to negotiate now.”
Intimidation:
Threats: Players can use intimidation to coerce the goblins into compliance. This could involve threats of violence or promises of retribution.
Example: “You step forward, glaring fiercely at the goblins and declare, ‘Leave now, or face the consequences.’ The goblins, visibly shaken, exchange nervous glances and start to back away.”
Using Bribes and Intimidation in Rolls:
1. Food or Supplies:
DC for Acceptance: Generally, the DC for accepting food or supplies can be around 10 to 15. This depends on the quantity and quality of the offered items.
Example Roll: A successful roll (e.g., 10 + combined Charisma bonus) means the goblins accept the bribe and are more amenable to negotiation. If they refuse, they might demand more or remain hostile.
2. Gold or Valuables:
DC for Acceptance: Offering gold usually has a lower DC, around 10 to 12, due to the goblins’ greed. Larger amounts may lower the DC further.
Example Roll: If the party rolls high enough to meet or exceed the DC, the goblins are likely to accept the bribe and provide favorable terms.
3. Intimidation:
DC for Intimidation: Intimidation checks might have a higher DC, ranging from 15 to 20, based on the goblins’ courage and the threat’s credibility.
Example Roll: If the intimidation roll is successful, the goblins might retreat or comply with the party’s demands. If it fails, the goblins may become even more defiant or aggressive.
Negotiation with Bribes and Intimidation:
Successful Bribe: If the bribe or intimidation is successful, describe how the goblins’ demeanor changes. They may become more cooperative, offer information, or agree to leave the area.
Failed Bribe/Intimidation: If the bribe or intimidation fails, the goblins could become more aggressive, demand more, or refuse to negotiate further. Consider adding complications such as reinforcements or traps if the players persist.
DM Tips:
Be Creative: Allow players to come up with inventive bribes or intimidation tactics. Adapt your responses to fit the situation and the players’ actions.
Maintain Balance: Ensure that bribes and intimidation are balanced to prevent players from bypassing encounters too easily or making encounters excessively difficult.
Goblin Stats
Goblins (7): AC 13, HP 3, Damage 1d6 -1, Morale 5 Loot: 2d6 silver each. One of the goblins has an iron necklace with 5 holes in a star pattern. This necklace is required to pass the puzzle in area 4.
There are piles of debris scattered around the area. Goblins and players can use these for cover, gaining a +2 bonus to AC and Dexterity saving throws against ranged attacks.
Morale Check
When a creature drops below 50% of their hit points they must make a morale check (Target DC 20 vs d20 + monster morale) or become broken. If the last attack was with a natural 20, then the check is made with Disadvantage.
Broken combatants have two options:
Flee the combat. Move away from combat at double normal movement speed. If a player character (or monster) has a ranged weapon readied in hand, they can make one free attack against the fleeing monster.
Surrender the combat. Literally throw down their arms and plead for their lives.
Searching the Room
Now that the threat has been dealt with, it’s time for the characters to explore the room thoroughly. Searching can reveal additional rewards and secrets that might not be immediately obvious.
Search Check:
Individual Search: To find hidden elements like the secret door in the eastern wall, each character should roll a d20 and add their Wisdom bonus and, if applicable, their search bonus. If the total meets or exceeds the search Difficulty Check (DC) of 15, they successfully locate the hidden door.
Exceptional Find: If the search roll is 20 or higher, the party discovers a Long Sword +1 amidst the cache of mostly rusted and broken short swords.
Team Search:
Teamwork Rule: If the entire party decides to search the room together, use the teamwork rule. This allows for a single collective search check, using the highest player’s Wisdom bonus (plus any search bonuses) and advantage (rolling 2d20 and taking the highest result). If this team search fails, no additional attempts can be made until someone in the party gains a level.
Importance of Searching:
Not Essential, but Rewarding: While finding the secret door and the Long Sword +1 is not necessary to advance the story, it emphasizes the importance of thorough exploration. Characters who search diligently can uncover valuable items and secrets that enhance their adventure.
Time Management:
Searching Time: Searching a room takes 1 turn per 30′ x 30′ space. Be sure to track the time spent searching, as it impacts time-based events. For example, if torches burn for 1 hour (6 turns), players must manage their time carefully to avoid running out of light or other resources.
Encourage players to make searching a standard part of their approach. It not only enriches the adventure but also rewards their curiosity and attention to detail.
3. Dining Room
The door to this room is closed and bears a crudely painted skull and crossbones. The ominous marking hints at potential danger or warnings of what lies beyond.
Listening at the Door: Before opening the door, players can listen for any sounds coming from within. Make a Listening Check (DC 12) to detect any noises or movement inside.
Checking the Door for Traps: Encourage players to check for traps before opening the door. This could involve a Wisdom Check or Search Check (DC 14) to ensure the door is safe to open.
Upon opening the door, your players enter a 25′ x 15′ dining room. A large marble fireplace dominates the eastern wall, its cold and empty hearth a stark contrast to the room’s otherwise eerie atmosphere. A long, bare wooden table stretches the length of the room, flanked by eight wooden chairs: three on each side and one at each end. Seated in the end chairs and two chairs on each side are human skeletons dressed in tattered rags. These skeletal figures sit upright but remain motionless. In front of each chair is a golden goblet and dusty flatware. The room is dimly lit, which can affect search checks.
Additional Notes for the Dungeon Master:
Lighting the Fireplace: To improve visibility and remove any disadvantage on Wisdom (Search) checks due to low light, players can light a fire in the marble fireplace. This will illuminate the room and make it easier to spot details.
Time Tracking:
Searching a Room: It takes 1 turn per 30′ x 30′ space to thoroughly search the room.
Mapping a Room: Also takes 1 turn per 30′ x 30′ space.
Searching for Traps: Each attempt to find traps takes 1d4 rounds.
Gold Goblets: If any character touches a goblet, they will discover that the “gold” goblets are actually tin, covered with yellow mold.
Yellow Mold: Each time a goblet is touched, roll a d20. If the result is 10 or less, the mold releases a small cloud of spores, affecting only the character who disturbed the goblet. The affected character takes 1d4 points of damage and must make a Constitution Save DC 11. If they fail, they start choking and are unable to perform any actions for d6 rounds.
4. Oh No!
This room has two doors one to the west and one east. On the walls by the doors are four small round holes burrowed into the stone. Upon the last party member passing through the door into this room the door immediately slams shut trapping the party. From the top of the room, water begins to fill the chamber. Already the water is starting to pool!
The holes in the walls are part of an elaborate trap set by the original owner of this ruin. Each hole contains 5 stones arranged in a specific pattern. This pattern matches the necklace found on the goblins in Area 2.
Searching for the Trap Mechanism: To find the mechanism and understand the trap, players need to search the room. Searching a room takes 1 turn per 30′ x 30′ space. Characters should make a Search Check or Detect Traps to identify that the holes are part of the locking mechanism.
Solving the Trap: Once the mechanism is identified, players need to correctly align the necklace stones with the holes. Each attempt to place the necklace stones into the holes requires rolling a d20:
On a roll of 10 or less, the necklace doesn’t fit, and the water rises faster.
Success with the correct pattern means no further checks are needed.
Disabling the Trap: If the necklace is not found, players must rely on other methods to disable the trap, such as rigging a solution. This may require a DC Check of 20 due to the lack of the necklace. If players include a thief, they might use their Disarm Traps skill to attempt to disable or mitigate the trap.
Managing Time: Track the number of attempts the players make to solve the trap. Use a tracker for up to 10 checks. The water level rises with each failure:
At 5 failed attempts: The water level reaches a point where characters must start swimming. Swimming counts as difficult terrain, and characters underwater face the following penalties:
Fire attacks do no damage.
Melee attacks are at disadvantage and deal half damage (rounded up).
Ranged attacks are impossible.
Spells cannot be cast unless the character can speak underwater.
At 10 failed attempts: The room is completely filled with water, and the characters begin to drown. Describe the situation vividly to highlight the dire consequences of failing to disable the trap.
Total Party Kill Warning: If the trap is not disabled and all 10 attempts are unsuccessful, the room will fill completely with water, leading to a total party kill.
5. Beware!
This room has a barred and locked door leading into it, adorned with a crudely carved sign that is difficult to read.
The door to this room is secured with a padlock, which requires a DC12 check to pick.
Reading The Sign:
On the door is a sign that reads, “Shh, the babies are sleeping!” written in Goblin. This message is a warning about the danger inside: two giant spiders, each roughly the size of a small car.
If a character cannot read Goblin, a thief can attempt a Read Languages check with a DC12. This check will allow the character to understand the message on the sign.
A wizard could also use a spell, such as the 2nd level Comprehend Languages if they have the spell in their spell book.
Picking Locks:
A thief cannot retry picking the same lock until they gain another Level of Experience.
The padlock can be picked with a DC12 check.
Only characters with Thieves Tools can attempt to pick the lock.
Each lock can only be tried once per lock attempt.
Breaking the Lock:
Alternatively, characters with sufficient Strength can attempt to break the lock. To do so, they must make a Strength check with a DC15.
If successful, the lock breaks, but this method could make noise and potentially alert the spiders inside.
If the Strength check fails, the characters may need to find another way to gain entry.
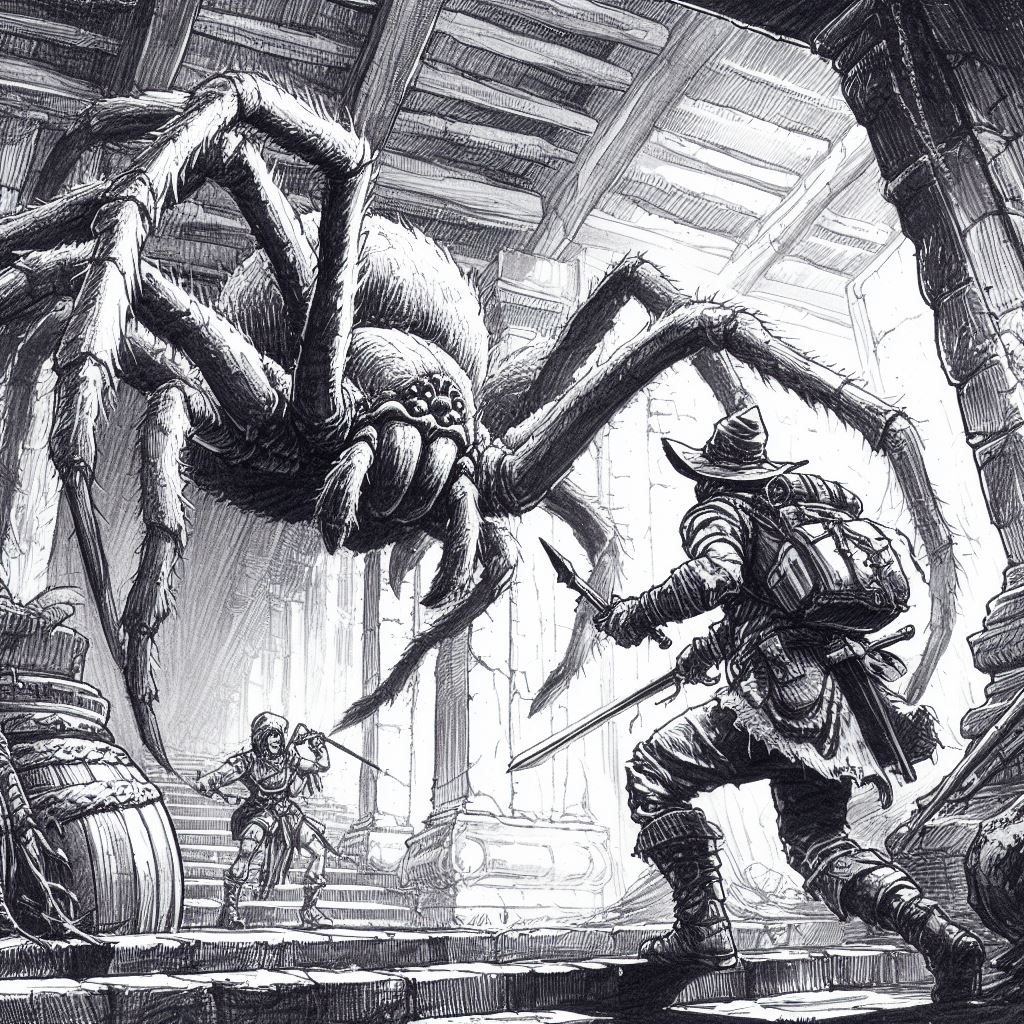
UPON opening the door read:
This large chamber is covered in thick sticky strands of silk. There is a clear path to the center, but the corners are unreachable.
ROLL FOR SURPRISE
Roll for surprise: DM roll d20 (+4 because Spiders get a bonus) vs the highest party notice. If the DM roll is equal to, or more than the notice, then the party is surprised and the monsters get a round to attack without the party attacking back.
If the party is successful read on, else the spiders attack with a free combat round.
Movement immediately catches your eye as two giant spiders descend from the ceiling and attack! Roll for initiative.
Giant Spider Stats
Giant Spider (2): AC 14, HP 10, Bite 1d8 (DC 10 vs Constitution or become poisoned). Morale 5
Special attack: Web. Anyone attacked with web must make a DC10 vs Dexterity or become immobilized by the web.
Immobilized – You cannot move on your own: your Speed is 0. You can still attack if you are in range.
Poison – DC 10 vs Constitution or die in 1d6 rounds (as rolled by the DM)
Loot: There is a pouch in the spider’s web with 2d8 gold pieces as well as a silver necklace (worth 50 gold pieces) as well as a spell scroll of the Shield spell
6. Nest
Thick smoke fills the top of this room as a number of disgusting goblins lounge around on piles of straw and filth. Some sort of animal is roasting over a small campfire in the center of the room.
This is an EXCELLENT opportunity for the party to ambush the goblins. They’re too preoccupied with cooking to notice the party come in.
Ambush: Roll d20 and add the lowest Wisdom modifier in the party to establish the party’s hide DC. DM roll d20 – equal or greater than the party DC means the ambush fails. If successful the party gets one round of attacks without the DM taking any actions.
Goblin stash. 1 small silver key, and a locked metal box (DC15 to unlock and DC 10 vs Search to detect the poison needle trap). The box contains a +1 dagger, 4,000 copper pieces, 3,000 silver pieces, and 4 potions of healing (restores 1d8 Hit Points each)
The metal box is trapped with poison. Poison is DC 10 vs Constitution or die in 1d6 rounds.
7. Audience Chamber
This extremely large chamber is brightly lit by metal torches lining the walls. At the far end the floor is raised with a large stone throne in the middle. Just in front is a round table with five large, muscled humanoid creatures with dull green skin, coarse dark hair, beady red eyes, and protruding, tusk-like teeth. As the door closes by itself behind the party, the creatures stop the dice game they’re playing and look up at the party. The biggest of the bunch, an all white monster, speaks out to the party, “Well well well… what do we have here?!?”
These orcs are more intelligent than the monsters encountered thus far. They are willing to talk and negotiate with the party.
Orc (4): AC 13, HP 7, Attack +2, Damage 1d8 +2, Morale 12
Orc individuals have 1d6 gold pieces on them.
Exit to the west and HIDDEN DOOR (DC15 Search) in the eastern wall. If the players have had a fun and you’d like to reward them, then have the door be open and not requiring a check to find it.
Hidden room contains 1,000 silver pieces, 4 gems (value 60 gp each), diamond pendant and matching earrings (100 gp), and 6 potions (unidentified keep their function secret) – 1 giant strength, 2 of water breathing, 2 of cure poison and 1 of invisibility. The treasure room contains various valuable items and gold. Remember to account for encumbrance when carrying treasure. The Orc leader carries a +1 mace.
Unidentified Magic Items. Magic Items and Potions can be identified by a qualified magic user, typically in town at a cost of 1GP each. Potions have a single use and testing them will use them up.
The Ending
After packing up all of your hard-earned loot, you make the journey back to town, your packs heavier and your reputation growing. As you step into Cresthaven, the town elders greet you with a magnificent feast to celebrate your victory. The villagers cheer your names, lifting their mugs in honor—it looks like you were born to be an adventurer!
Returning to the Cross Arms Tavern & Inn(If the players took Tavin’s quest)
As the celebrations die down, you make your way to the Crossed Arms Tavern, where the familiar figure of Tavin Reed is waiting at a corner table. He looks up as you approach, eyes bright with hope.
If you recovered his pendant: Tavin’s face lights up as he takes the item in his hands. “You truly found it? I don’t know how to thank you!” He pulls out a small pouch of 30 gold as a reward and offers to buy you a round of drinks.
If you never took the quest or ignored him: Tavin eyes you as you enter but doesn’t say anything, simply nodding as he sips his ale.
If you lied or betrayed him: His expression darkens. He mutters under his breath and pointedly ignores you. Your Reputation in Cresthaven is reduced by 1.
Regardless of the outcome, this wraps up the personal side of the adventure, setting up future interactions with the people of Cresthaven.
Distributing Rewards
Now it’s time to distribute experience points and money. Each player should receive:
2,000 experience points for clearing the dungeon.
1 experience point for each gold piece of loot value collected.
Bonus XP for exceptional roleplaying, creative problem-solving, or teamwork.
The rewards should reflect not just combat, but also how well the players interacted with the world—whether through clever negotiation, strategic planning, or bold decision-making.
Share Your Story!
As you wrap up your adventure with Goblin Raiders, we’d love to hear about your experience! Whether you’re a Dungeon Master who guided the party through thrilling challenges or players who faced off against crafty goblins, your stories can inspire others and help refine future adventures.
What were your most memorable moments?
Did your party take a unique approach to the dungeon?
What creative solutions or unexpected twists occurred?
Share your thoughts and feedback to help shape the next great adventure!
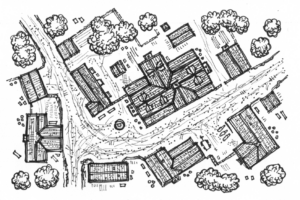
I’m confused by the numbering on the map. The text doesn’t seem to follow the path on the map. Is it just me or does the map at the top of the page make almost no sense in regards to the actual adventure? Help!
From reading the text I thought that the dungeon was actually a linear path and that the party will eventually reach all of the rooms. What I didn’t realize was that, in fact, they could choose one room over the other. Such as choosing to ignore room 3 and go west instead. The same with ignoring the spider room and going north straight to the Orcs. I just ran this adventure with some friends and it all became clear as we went along
thanks 🙂


After you've run the adventure, post your thoughts and experience!!!
I’m confused by the numbering on the map. The text doesn’t seem to follow the path on the map. Is it just me or does the map at the top of the page make almost no sense in regards to the actual adventure? Help!
How do you mean? The numbers on the map directly reference the numbers in the titles of the text.
From reading the text I thought that the dungeon was actually a linear path and that the party will eventually reach all of the rooms. What I didn’t realize was that, in fact, they could choose one room over the other. Such as choosing to ignore room 3 and go west instead. The same with ignoring the spider room and going north straight to the Orcs. I just ran this adventure with some friends and it all became clear as we went along
thanks 🙂
Cool! How did the adventure work out? Was it helpful?