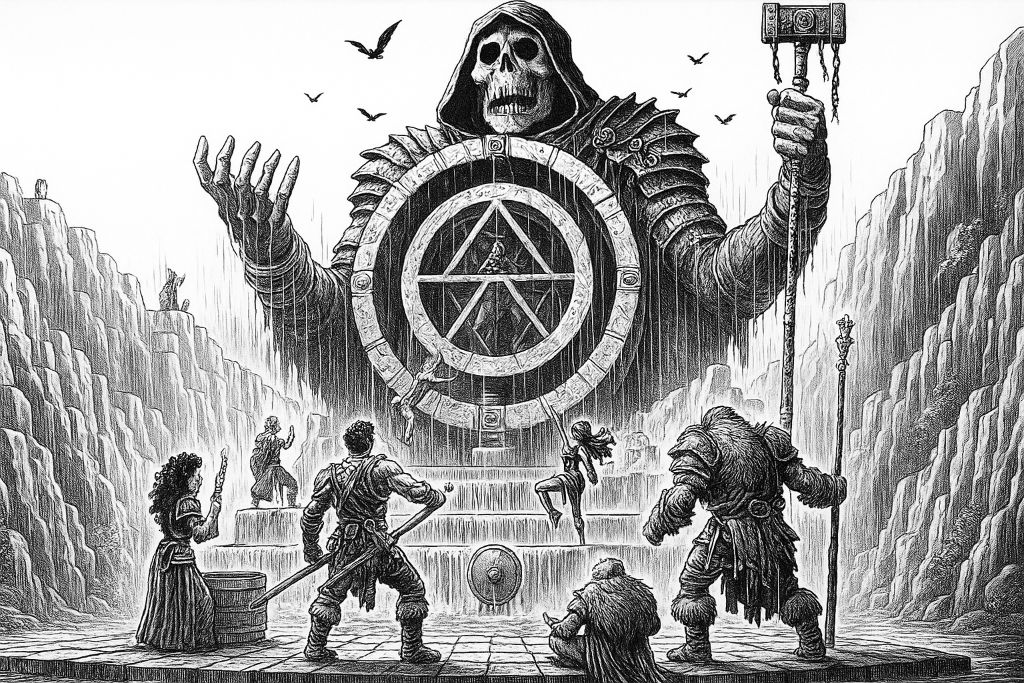
The Infernal Gauntlet is a deadly dungeon crawl that tests every aspect of the party’s abilities. When the characters are mysteriously transported to a strange realm, they find themselves prisoners of the enigmatic Architect of Despair—a theatrical villain who subjects them to a series of increasingly dangerous trials. Success means freedom and treasure; failure means becoming permanent residents of his twisted masterpiece.
This adventure emphasizes creative problem-solving, teamwork, and resource management as the characters navigate six distinct chambers, each designed to challenge different skills and abilities.
Adventure Hooks:
The party awakens in the gauntlet with no memory of how they arrived
A mysterious benefactor sends the party to investigate disappearances
The characters volunteer to rescue other victims of the Architect
Opening Scene
When you’re ready to begin, read the following aloud:
The moment you awaken, you are greeted by suffocating darkness and the sensation of cold, unyielding stone beneath you. Before you can gather your thoughts, a deep, mocking voice booms through the void, each word dripping with theatrical menace:
“Welcome, mortals, to the Infernal Gauntlet. I am the Architect of Despair, and this will be your proving ground—or your grave.”
A sudden flash of green light illuminates your surroundings. You find yourselves in a circular chamber carved from black stone, with no visible exits save for a single steel door inscribed with glowing runes. The air hums with arcane energy, and the faint sound of grinding gears echoes from somewhere beyond the walls.
“Each chamber ahead will test you. Your strength. Your wit. Your resolve. Survive all six trials, and freedom is yours. Fail, and you will find yourselves permanent residents of my masterpiece.”
The door slides open with a mechanical hiss, revealing only darkness beyond. A sense of foreboding washes over you as you steel yourselves to step forward into the unknown.
GM Notes: Allow the characters a moment to examine their starting chamber and interact with each other. The runes on the door are purely decorative but can be examined. The Architect’s voice will occasionally taunt the party throughout the adventure—use this to maintain tension and provide hints when they’re struggling.
Room 1: The Pit of Precision
Testing Agility and Timing
Room Description
The moment you step into the room, the door behind you slams shut with a reverberating clang that echoes through the chamber. Torches flicker to life along the walls, casting dancing shadows that reveal your predicament.
Before you stretches a pit that spans the entire width of the 40-foot-long room. The pit is filled with a churning, bubbling liquid that hisses ominously and gives off acrid vapors. The liquid’s surface occasionally pops with small bursts that suggest it’s highly corrosive.
Your only path forward consists of narrow stone platforms jutting from the pit walls—each barely wide enough for a single foot. At irregular intervals, metal pendulums swing across the pit, their razor-sharp blades slicing through the air with mechanical precision. The rhythmic whoosh of their passage creates an ominous countdown.
On the far side of the pit, a metal door gleams in the torchlight, etched with the single word ‘Agility.’
Challenge Mechanics
Observing the Pattern: Characters who spend time watching the pendulums can make a Wisdom check (DC 12) to discern their timing pattern. Success grants advantage on avoiding the blades; failure means they must navigate without understanding the rhythm.
Crossing the Pit: Each character must make a series of jumps across the stone platforms:
Platforms 1-3: Dexterity Save (DC 10)
Platforms 4-5: Dexterity Save (DC 14)
Failure: The character slips and falls into the acid, taking 2d6 acid damage per round until rescued
Avoiding the Blades: As characters move across the platforms, they must time their movement to avoid the swinging pendulums. This requires a Wisdom Check (DC 12) for each character. Failure results in being struck for 1d8 slashing damage.
Tactical Considerations
Encourage creative solutions. Characters might use rope to help each other, cast spells to aid their crossing, or even attempt to stop the pendulums (though this requires exceptional effort). Teamwork should be rewarded with narrative advantages or minor bonuses.
Success Reward: The Architect’s voice echoes: “Impressive footwork! But grace alone won’t save you in what lies ahead…”
Room 2: The Puzzle of Ten Thousand Lights
Testing Intelligence and Magical Intuition
Room Description
The door seals behind you with a soft hiss as you enter a perfectly circular chamber, 30 feet in diameter. The walls immediately begin to pulse with an eerie, shifting glow as thousands of runic symbols etched into the stone flicker and rearrange themselves in patterns that hurt to follow.
The air crackles with latent magical energy, making your skin tingle and your hair stand on end. In the center of the room stands a pedestal carved from what appears to be crystallized starlight, upon which rests a pulsing crystal orb that shifts through every color imaginable.
The only exit is another featureless metal door on the opposite wall, marked with the word ‘Clarity.’ As you watch, the runic patterns on the walls continue their hypnotic dance, occasionally pausing in configurations that seem almost… familiar.
Challenge Mechanics
Examining the Runes: An Intelligence Check (DC 14) reveals that beneath the chaotic shifting, there’s an underlying pattern—a sequence of twelve specific runes that repeat every minute. Characters who fail this check and touch the walls trigger a glyph trap, taking 1d8 radiant damage.
Understanding the Crystal: The crystal orb serves as both key and amplifier. When touched, it responds to the character’s thoughts and intentions, but requires precise mental focus to control.
Solving the Puzzle: Once the pattern is identified, characters must use the crystal to “light up” the correct sequence of runes on the walls:
Insight Check (DC 12): Determines the correct order for activating the runes
Failure: Triggers a feedback loop, dealing 1d6 psychic damage and resetting the puzzle
Tactical Considerations
This puzzle rewards careful observation and patience. Characters with magical backgrounds might have advantage on understanding the crystal’s function. The Architect may provide cryptic hints if the party struggles for too long.
Success Reward: The runes blaze with brilliant light before going dark, and the door opens silently. The crystal orb becomes mundane but can be kept as a minor magical focus.
Room 3: The Hall of Spikes
Testing Caution and Trap Detection
Room Description
You step into a long, narrow corridor stretching 50 feet ahead. The walls are carved with intricate patterns that seem to shift in your peripheral vision, and the floor is divided into a grid of identical stone tiles, each about two feet square.
The air is thick with tension, and every few seconds, you hear a faint mechanical ‘click’ echoing from hidden mechanisms within the walls. Occasionally, a barely perceptible ‘whoosh’ of air suggests movement behind the stone.
At the far end of the corridor, another door awaits, marked with the word ‘Cunning.’ The most direct path would require crossing approximately 25 tiles to reach safety.
Challenge Mechanics
Detecting Safe Tiles: Characters can attempt to identify safe passage:
Wisdom Check (DC 15): Reveals faint scratches, discoloration, or slight differences in the tiles that indicate which ones are safe
Disable Traps Check (DC 15): Allows a character to permanently disable one tile’s spike mechanism
Crossing the Hall: For each tile a character steps on without proper knowledge:
Dexterity Save (DC 13): Success means they step lightly enough to avoid triggering the mechanism
Failure: Spikes shoot up from the tile, dealing 1d8 piercing damage
Tactical Considerations
This room rewards methodical thinking and teamwork. Characters might use tools like poles or thrown objects to test tiles, or work together to find safe paths. Consider allowing creative solutions like using magic to detect the mechanisms or temporarily disabling multiple traps.
Success Reward: The Architect’s voice carries a note of grudging respect: “Clever little mice… but the real test lies ahead.”
Room 4: The Flood Chamber
Testing Problem-Solving Under Pressure
Room Description
You enter a square chamber, 30 feet on each side, with walls carved with intricate aquatic motifs—spiraling shells, flowing water patterns, and creatures of the deep. The moment the door seals behind you, hidden pipes in the walls burst open, sending torrents of ice-cold water gushing into the room.
The water level rises alarmingly fast—already ankle-deep and climbing steadily. In the center of the room, you spot an iron grate set into the floor, currently locked tight. Beside it stands a complex mechanism featuring five rotating metal dials, each inscribed with different symbols that match some of the carvings on the walls.
The exit door on the far wall remains sealed, but you notice a small slot next to it that seems designed to accept something. The water continues to rise, now reaching your knees.
Challenge Mechanics
Deciphering the Puzzle: The dials must be set to specific positions based on the wall carvings:
Intelligence Check (DC 14): Reveals which symbols correspond to the correct sequence
Time Pressure: Characters have approximately 10 rounds before the water reaches dangerous levels
Alternative Solutions:
Strength Check (DC 16): Force the grate open through brute strength
Lock Picking: Attempt to pick the grate’s lock mechanism (DC 15)
Drowning Risk: Once the water reaches chest height (round 8), characters must make Constitution Saves (DC 12) each round or begin suffocating, taking 1d6 damage per failed save.
Tactical Considerations
This encounter emphasizes time pressure and quick thinking. Some characters might work on the puzzle while others attempt alternative solutions. The grate leads to a drainage system that lowers the water level and opens the exit door.
Success Reward: As the water drains away, the exit door opens with a satisfying click. Characters may find a waterproof pouch containing useful items.
Room 5: The Arena of Shadows
Testing Combat Prowess and Self-Knowledge
Room Description
You step into a perfectly circular arena, 40 feet in diameter, with walls that seem to absorb light itself. The only illumination comes from a ring of glowing runes inscribed into the floor, creating a circle of pale light in the center of the room.
As you move into the light, the air itself seems to ripple and distort. The shadows cast by your bodies begin to move independently, peeling away from you like dark liquid. These shadow-forms rise from the floor, solidifying into perfect dark replicas of yourselves—same weapons, same armor, same stance.
The shadow-versions of yourselves regard you with hollow, glowing eyes before raising their weapons. There is no hesitation, no mercy in their movements as they attack.
Challenge Mechanics
Shadow Doppelgängers: Each character faces a shadowy version of themselves with the following modifications:
Hit Points: 50% of the original character’s current HP
Abilities: Identical to the original character but with one key weakness
Tactics: Shadows use the same strategies and abilities as their originals
Exploiting Weaknesses: Characters can attempt to identify and exploit their shadow’s weakness:
Insight Check (DC 12): Reveals a specific vulnerability based on the character’s own limitations
Creative Solutions: Reward innovative tactics that play against the character’s typical combat style
Tactical Considerations
This encounter is designed to make players think about their characters’ fighting styles and adapt. Shadows might be vulnerable to unexpected tactics—a heavily armored fighter’s shadow might be slow, while a sneaky rogue’s shadow might be vulnerable to direct confrontation.
Success Reward: As the shadows dissolve, they whisper fragments of advice or warnings about the final challenge ahead.
Room 6: The Gauntlet’s Core
The Final Test of Sacrifice and Teamwork
Room Description
You enter a vast, domed chamber with a ceiling that stretches up into darkness. The walls are lined with intricate machinery—gears, pistons, and arcane devices that pulse with malevolent energy. The floor is cracked and unstable, with chunks of stone occasionally falling from above.
In the center of the room stands a massive lever, easily eight feet tall, marked with a brass plate that reads ‘SACRIFICE’ in bold letters. The lever is surrounded by a complex mechanism that clearly requires significant force to operate.
As you take in the scene, hidden panels in the walls slide open with mechanical precision, revealing four automaton guardians. These constructs are humanoid in shape but clearly artificial, with glowing red eyes and weapons integrated into their arms. They advance with purposeful, measured steps.
On the far wall, you can see your exit—a door marked with the word ‘FREEDOM’—but it remains sealed tight. The entire chamber shudders ominously, suggesting that time is not on your side.
Challenge Mechanics
The Collapsing Chamber: Every few rounds, chunks of the ceiling fall, creating difficult terrain and potentially injuring characters. The room will collapse completely in 12 rounds.
Automaton Guardians: Four mechanical constructs defend the lever:
Armor Class: 16
Hit Points: 30 each
Attack Bonus: +6 to hit
Damage: 2d8 slashing damage
Special: Immune to poison and psychic damage; resistant to bludgeoning and piercing damage
Operating the Lever: The massive lever requires significant effort to pull:
Strength Check (DC 18): Multiple characters can work together, combining their efforts
Time Required: Takes 2 full rounds of concentrated effort to complete
The Final Sacrifice: Once the lever is pulled, the exit door’s mechanism activates, but it requires a meaningful sacrifice to complete the opening sequence. This could be a valuable magical item, a significant amount of gold, or even a character accepting a permanent but minor curse.
Tactical Considerations
This final encounter tests everything the characters have learned. They must divide their attention between combat, environmental hazards, puzzle-solving, and teamwork. The “sacrifice” element should be meaningful but not campaign-ending—perhaps the loss of a magic item or accepting a minor ongoing effect.
Success Conditions: Pull the lever, make the required sacrifice, and survive until the door opens. Characters don’t need to defeat all the automatons, just survive long enough to escape.
The Final Victory: Escape and Revelation
Once the characters complete the final challenge, read the following:
The grinding sound of ancient machinery begins to fade as the great lever locks into position. The floor beneath you steadies, and the falling debris stops. A moment of eerie silence fills the chamber before the exit door swings open with a satisfying thunk, revealing brilliant light beyond.
Shielding your eyes, you step through the doorway and find yourselves in the most ostentatiously decorated throne room you’ve ever seen. Velvet curtains embroidered with gold thread hang from every surface, crystal chandeliers cast rainbow patterns across the walls, and tapestries depicting your recent trials cover every available space—rendered in an artistic style that’s somehow both flattering and deeply unsettling.
Seated upon a throne apparently constructed from writhing, living serpents is a rotund figure draped in a sequined robe that catches the light from a dozen different angles. His face is hidden behind an oversized mask shaped like a leering theatrical jester, though his eyes sparkle with undisguised delight.
He rises slowly, beginning a slow, sarcastic clap that echoes through the chamber.
The Architect’s Speech:
“Bravo! Bravo, my dear contestants! You’ve done it! You’ve survived the Infernal Gauntlet and provided me with such exquisite entertainment! You’ve laughed in the face of acid pits, outwitted my shadows, and even managed not to drown—which, frankly, I wasn’t expecting from all of you.”
He descends from his serpentine throne with theatrical flair.
“But I digress! You’ve proven yourselves not only worthy of survival but also deserving of my finest treasures and—more importantly—my eternal… well, let’s call it ‘professional appreciation.'”
With a grand gesture, he causes an ornate treasure chest to rise from the floor. It’s so heavily gilded and bejeweled that it’s almost painful to look at directly.
“Within this chest lies your reward. Riches, power, magical trinkets—the usual heroic compensation package. And, of course, your freedom! Go forth and regale the world with tales of your heroics, but remember: I will be watching. Always watching. After all, one never knows when I might require… additional entertainment.”
His theatrical laughter echoes as the chamber fills with brilliant light, and you feel the familiar sensation of magical transportation beginning to take hold.
Character Rewards
Treasure: The ornate chest contains:
Gold: 1,000 gold pieces distributed among the party
Gems: Two rare gems worth 500 gold each
Ring of Swimming: This silver ring has a wave pattern etched into the band. It continually grants the wearer a +5 bonus to swimming checks
Runesmiter: This ornately carved warhammer is etched with powerful runes. On a successful hit, the runes flare to life, dispelling any ongoing magical effects on the target (as the Dispel Magic spell). The Runesmiter also creates a permanent 10-foot-radius Antimagic Field centered on the warhammer’s head
Ring of Feather Falling: The wearer of this ring is protected by a feather fall spell any time he or she falls more than 5 ft
Stones of Elemental Control: Crystal spheres radiating vibrant colors that channel the power of a specific element, granting the ability to charm elementals. This charm makes them regard you as their trusted friend and ally (treat the target’s attitude as friendly). 3 uses per day
Experience: Award each character 500 bonus experience points for completing the gauntlet.
Reputation: The characters gain the title “Champions of the Architect” and receive an engraved token bearing this inscription. This may have future implications in your campaign.
Continuing the Adventure
Immediate Aftermath
The characters find themselves returned to their original location with all their gear intact. However, their experience has left its mark:
Fame: Word of their achievement spreads, bringing both admiration and unwanted attention
The Mark: Each character bears a small, barely visible mark—perhaps a tiny scar or a patch of prematurely gray hair—that identifies them as survivors of the gauntlet
Future Hooks: The Architect’s promise to “be watching” opens possibilities for future encounters
Campaign Integration
Recurring Villain: The Architect of Despair makes an excellent recurring antagonist—theatrical, powerful, but not entirely malevolent. He might offer future challenges, serve as a source of information, or even become an unlikely ally against greater threats.
Adventure Consequences: Consider how the characters’ new reputation affects their interactions with NPCs, and whether their experience in the gauntlet has taught them new techniques or granted them insights they can use in future adventures.
The Architect’s Network: Perhaps the Architect has agents throughout the world, or other “entertainment venues” that the characters might encounter. He might even have rivals or mentors of his own.
Appendix: Additional Treasures and Variants
Room-Specific Rewards
Room 2 – Crystal Focus: The puzzle crystal becomes a minor magical focus, granting +1 to spell attack rolls for 24 hours (recharges at dawn).
Room 4 – Survivor’s Kit: A waterproof satchel containing a potion of water breathing and 100 additional gold pieces.
Room 6 – Adaptive Weapon: Instead of the Runesmiter, consider the Blade of Adaptation—a weapon that deals additional elemental damage based on the wielder’s current environment.
Difficulty Variants
Easier Version: Reduce all save DCs by 2, increase starting hit points by 10, and provide additional hints through the Architect’s commentary.
Harder Version: Increase all save DCs by 2, add time limits to more rooms, and include additional environmental hazards.
Large Groups: Add additional shadow duplicates in Room 5 and an extra automaton guardian in Room 6.
Alternative Architect Personalities
The Scholarly Tormentor: Obsessed with testing theories about courage and cooperation
The Bored Noble: Seeks entertainment to relieve centuries of ennui
The Reformed Villain: Once evil, now uses his abilities to train heroes (though his methods remain questionable)
This adventure can serve as a standalone challenge or be integrated into a larger campaign as a test, trial, or unexpected detour. The Architect’s theatrical nature and the gauntlet’s reputation can provide ongoing story elements long after the characters have escaped.